|Reading time: 8 minutes
How to Create a Property Video Walkthrough

Oliver H.
Oliver covers Midlands property trends and practical selling tips for homeowners. He focuses on clear, jargon-free advice that helps private sellers stay in control.
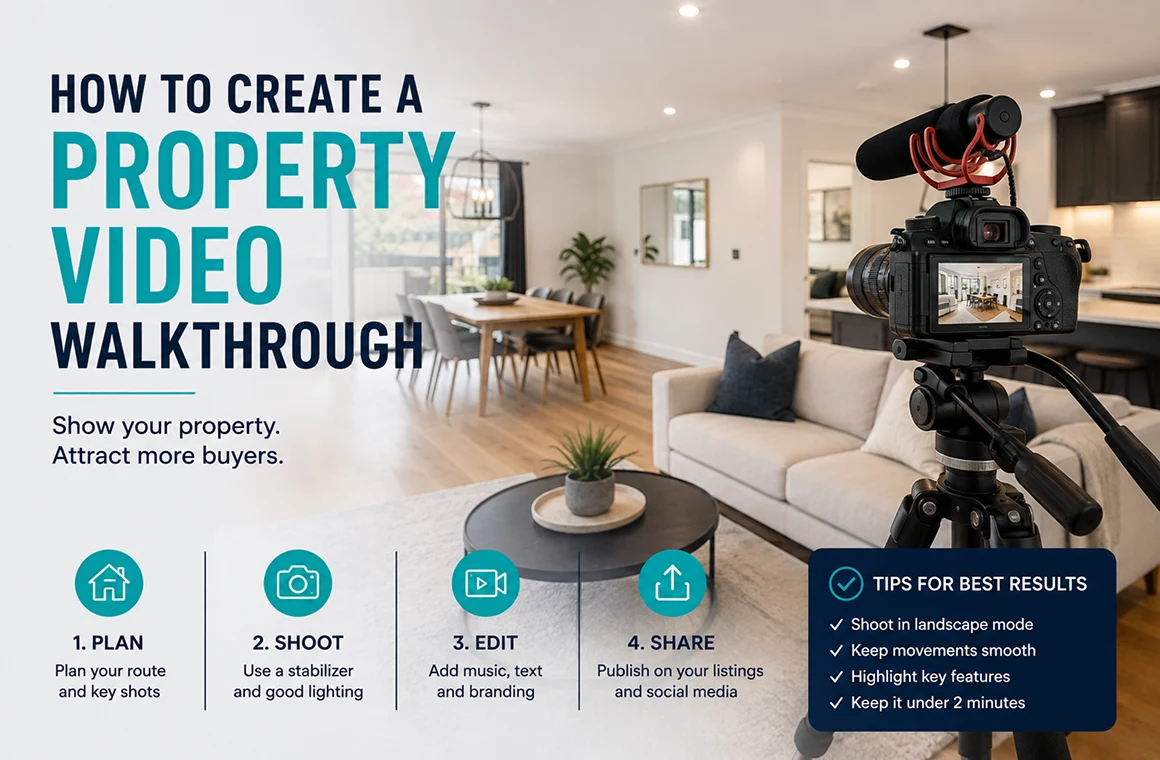
A property video walkthrough is a short filmed tour of your home, shot room by room, that gives buyers a real sense of the layout, light, and flow before they ever book a viewing. You don't need professional equipment to make one. A modern smartphone, good natural light, and a clean, decluttered home is all it takes to create a video that significantly improves your listing's performance. According to Zillow's analysis of property listings, homes promoted with a video walkthrough sell on average 14% faster than those without one.
If you're selling through YooSell, a well-shot video walkthrough is one of the most effective things you can add to your listing after professional photographs. This guide covers exactly how to film it, in the right order, with the right settings, and without common mistakes that make properties look smaller than they are.
Why a Video Walkthrough Matters for Your Sale
Photos show individual rooms. Video shows how those rooms connect.
Buyers increasingly expect to "walk" a home before they commit to a viewing. A clear, smooth walkthrough filters out uncommitted browsers and attracts buyers who already understand the layout and want to see it in person. Those buyers book viewings with intention, make quicker decisions, and are less likely to pull out after viewing.
A well-produced walkthrough also helps your listing stand out on Rightmove, where most properties are competing with identical photo grids. A video thumbnail in your listing attracts significantly more clicks than a static gallery alone.
What Equipment Do You Actually Need?
You do not need a professional camera. Here is what works for a clean, effective UK property walkthrough:
Smartphone (iPhone 12 or Android equivalent and above): Modern phones shoot in 4K and handle low-light conditions well. Use the rear camera only.
Gimbal stabiliser (optional but recommended): A phone gimbal costs £40 to £80 and eliminates the shaky footage that makes rooms look chaotic. DJI OM 6 and Hohem iSteady are both reliable options.
Tripod with phone mount: Useful for static shots of rooms where you want to show the full space without walking through it.
Portable LED panel light: A single £25 LED panel eliminates dark corners in north-facing rooms or hallways.
No gimbal? Walk slowly, hold your phone with both hands, and keep your elbows tucked in. The difference in footage quality between a rushed, one-handed walkthrough and a steady, two-handed one is significant.
Before You Film: Preparation Checklist
The most common reason property walkthrough videos underperform is not equipment quality. It is preparation.
Before you press record:
Declutter every room. Remove personal photos, excess furniture, and anything sitting on worktops. Less furniture makes rooms read as larger on camera.
Open all blinds and curtains. Natural light is your best asset. Film on a bright day and let as much in as possible.
Switch on every light in the house. Use consistent bulb temperatures throughout (all warm white or all cool white). Mixed bulbs create odd colour casts in footage.
Open all internal doors. This creates a sense of flow and makes the property feel more spacious and connected.
Clean all mirrors and glass. Both pick up reflections on camera that are invisible to the naked eye.
Remove cars from the driveway. The exterior shot opens the video. A clear driveway gives a better first impression.
Put pets in another room. A dog appearing mid-walkthrough is charming in real life; on video it is a distraction.
The Right Filming Order: Room by Room
The sequence of your walkthrough matters. You are recreating the experience of arriving at and moving through the home. Follow this order:
Exterior approach. Start from the pavement or gate, walking slowly toward the front door. This establishes the street and the property's kerb appeal.
Front door and hallway. Enter as a buyer would. Show the width of the hallway and any storage.
Reception rooms. Living room first, then dining room. Start from the doorway and pan slowly across the room before moving in.
Kitchen. Show the full run of units, then move to any breakfast area or utility room.
Conservatory or garden room (if applicable): directly after the kitchen.
Garden. Exit through the back door, show the full length of the garden, and turn back to show the rear elevation of the house.
Upstairs landing. Film from the bottom of the stairs and narrate the bedrooms as you reach the top.
Bedrooms. Master first, then remaining bedrooms in size order.
Bathrooms and en-suites. Stand in the doorway and film across the room. Do not enter a small bathroom; it makes the space feel cramped.
Any notable feature. Loft room, home office, garage, or parking.
Camera Settings and Technique
Resolution: Film in 1080p or 4K at 30fps. 4K gives you more flexibility in editing. 1080p at 30fps is perfectly acceptable and produces smaller file sizes.
Orientation: Always film horizontally (landscape). Never film vertically. Your video will appear on laptop screens, smart TVs, and wide portal previews. Vertical footage looks amateur on these formats.
Speed: Move slower than feels natural. On camera, normal walking pace looks fast. Slow down by 40% and your footage will look smooth and considered rather than hurried.
Height: Keep the camera at approximately eye level (around 150cm to 160cm). This mimics the buyer's natural viewpoint. Filming too low makes ceilings look high but rooms look odd. Too high makes everything feel like a doll's house.
Avoid zooming: Zoom in post-production if needed. Zooming while filming creates unstable, amateur footage.
Narration, Music, or Silent?
You have three options for audio:
Silent with text overlays: Works well and avoids background noise issues (traffic, neighbours, appliances). Add room labels as text in post-editing using a free tool like CapCut or iMovie.
Background music only: Clean, royalty-free music creates atmosphere without requiring you to speak. Use a platform like Epidemic Sound or YouTube Audio Library. Keep the volume low enough that it sits behind the visual, not over it.
Live narration: The most personal option and effective when done well. Speak naturally, mention key features as you film ("this is the 22-foot open-plan kitchen-diner"), and describe things buyers can't see from camera angle alone (broadband speed, underfloor heating, triple glazing). Avoid reading a script; it sounds stilted.
If you choose to narrate, film in the early morning or on a weekend to minimise road noise and neighbour noise.
Common Mistakes to Avoid
These are the errors that make otherwise good walkthroughs look unprofessional:
Filming too quickly. Rushing from room to room creates a frantic tone that unsettles buyers rather than reassuring them.
Including the toilet in a bathroom shot. Frame your bathroom shots to show the shower, bath, and vanity. The toilet does not need to be the focal point.
Filming into bright windows. This silhouettes the room and blows out the light. Stand with the window to your side or use the HDR mode on your phone.
Leaving the TV on. Screens glow and flicker strangely on camera. Turn off all screens before filming.
Going past the 3-minute mark on a standard property. Two to three minutes is the ideal length for a three-bedroom home. Five minutes is the maximum for a larger property. Buyers stop watching after this point.
Poor audio on narrated videos. If you're narrating, film in a quiet room first to check audio quality. Wind noise outside is almost impossible to fix in editing.
Editing Your Walkthrough: Keep It Simple
You do not need complex editing software. For most property walkthroughs, a few basic cuts and a music track are all that's required.
Free tools that work well:
CapCut (mobile): Simple cuts, text overlays, music, and transitions. Intuitive and free.
iMovie (Apple): More control for Mac and iPhone users. Easy to add title cards and music.
DaVinci Resolve (desktop): Free professional-grade editing software if you want more colour control and polish.
Keep transitions simple. A straight cut between rooms looks cleaner and more professional than flashy wipes or dissolves. Add your property address as an opening title card and a simple "For more information" end card pointing buyers to your YooSell listing.
Export at 1080p minimum. Upload to YouTube (unlisted or public) and embed the link in your listing description, or share directly via your YooSell buyer messaging system.
How to Use Your Video Once It's Made
A finished walkthrough is only useful if buyers see it. Here is where to share it:
Your YooSell listing: Add the YouTube or Vimeo link directly to your listing description. Buyers viewing on Rightmove can follow the link.
YouTube: Upload as a public or unlisted video. Title it with your address and key features: "3-Bedroom Semi-Detached for Sale in Loughborough, Leicestershire."
WhatsApp and email: Send directly to buyers who have enquired but haven't booked a viewing. It gives them the detail they need to commit.
Social media: A short 60-second cut shared on Facebook or Instagram can reach local buyers beyond Rightmove's audience. Facebook groups for local housing are particularly active in the Midlands.
Conclusion
A property video walkthrough is one of the highest-value additions you can make to your listing, and it costs nothing but time. Homes with video sell 14% faster on average. Your phone is capable of producing footage that matches what most estate agents use in 2026, provided you prepare properly, film in the right order, and keep the pace slow and steady.
If you're selling through YooSell, pairing a well-shot walkthrough with professionally composed photos and an AI-assisted listing description gives your property the full presentation quality it deserves, at a fixed monthly fee from £49.50, with zero commission at completion.
Use YooSell's free Valuation Calculator to price your property accurately before you list. Then register and create your YooSell listing to go live on Rightmove with your walkthrough video today.
Read YooSell's full property guides for more practical advice on every stage of your sale.
Frequently Asked Questions
Start Selling Your Home Today!
Take control of your sale with YooSell. Get started today and explore how we can help you sell smarter, faster, and with less hassle.